
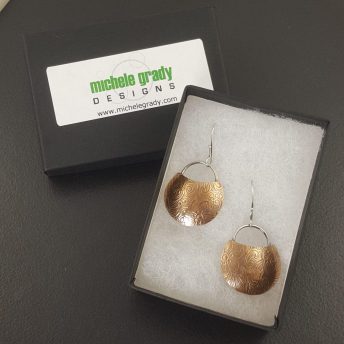
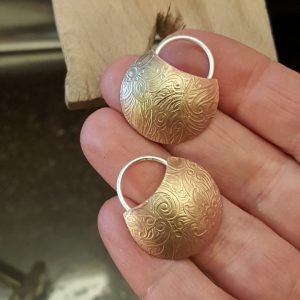
How to make mixed metal mini shield earrings
I have been making these mixed metal mini shield earrings as a made to order item for quite a while now. And since I had to make a pair for an order recently, I figured I would document the process and share it here along with photos and a step by step guide so you can see how I make them.
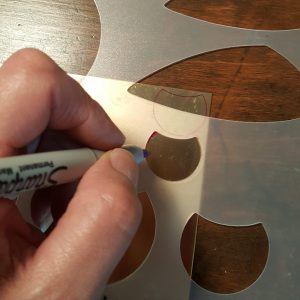
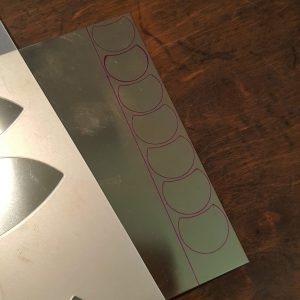
1. Draw out your earring shape.
The first step in making the mixed metal mini shield earrings is to use a stencil and trace out the shape onto the brass. The stencils that I use were purchased for cutting stones, but they also work well here too. I usually like to make a few pairs of these earrings at a time so I will run the pattern down the edge of the brass as close together as possible as to not waste any metal.
I draw out everything so I know where to cut my metal. There are 7 earrings drawn on my brass. The brass will stretch a little bit while being run through the rolling mill and the 8th earring should fit. That is the plan at least…fingers crossed! FYI….You will have to do this step again. You will see what I mean if you keep reading….
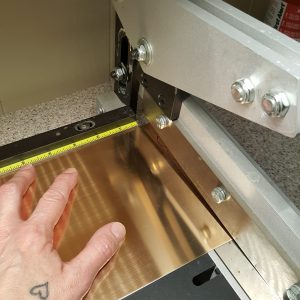
2. Cut the metal.
I use my bench shear to cut the strip of metal. You can use a saw here if you do not have a bench shear. And if you do not have a bench shear, I highly recommend getting yourself one! Not only does this save time but it also helps to keep you cutting lines perfectly straight, which also saves time down road when it comes to filing, etc. It also works great for cutting perfectly straight cuff bracelets!
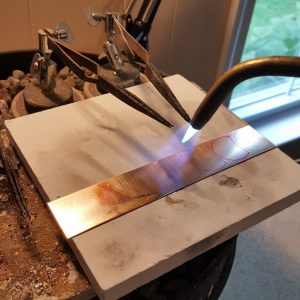
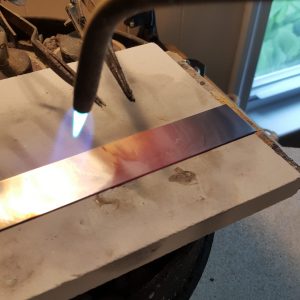
3. Anneal the metal.
You want to soften the metal before you put your pattern onto the brass. How you do that is to heat the brass with a torch until it glows a dull cherry red color. This process is called “Annealing”. Annealing softens the metal as to allow the pattern to transfer easily. If you do not anneal the metal you may not get as much detail onto your metal as you would if you do anneal it. You will lose your drawn on stenciled shapes here but that is OK because we will add them back again in a few minutes.
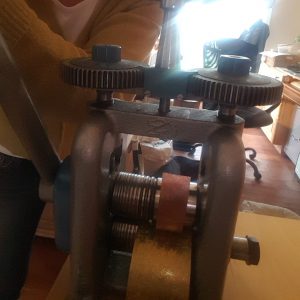
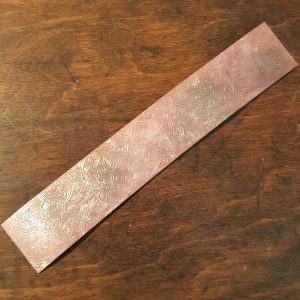
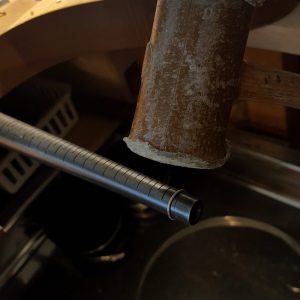
4. Roll print the pattern onto your metal.
To roll print you will need a rolling mill. A rolling mill is similar to a pasta maker, only it is used for rolling metal and not to make pasta. There are many different items you can use to roll print your metal and I could write a whole blog post on just that subject … hmmm there’s an idea… but here I have used patterned sheet metal. It works rather well for me and I can get many uses out of one sheet. I put the annealed metal and the patterned sheet into the rolling mill and crank the handle to pass them both through together. If done correctly, the annealed brass will come out with the exact pattern as the patterned sheet metal.
5. Stencil the shape again.
Yes, I know we did this part already but after annealing the metal the sharpie will burn off. Plus the metal has now been stretched due to roll printing it so we should be able to fit that last earring on here now so we have to repeat step 1.

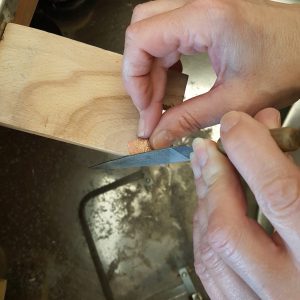
6. Saw out your shapes.
I use my jewelers saw and cut out each shape. You want to try to get them as close to the stenciled outline as you can. Do not worry if your shapes are not exactly perfect because we can fix that in the next step. But the closer they are to the shape the less time you will have to spend trying to fix them.

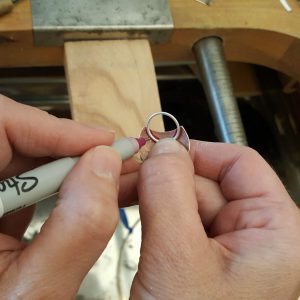
7. File to match.
File the edges of your brass shapes to make sure they are smooth and to form them into the shapes you were looking for. You do have to make 2 of them that “match” so you want to work on both of them and alternate them back and forth as to not file away too much of one and not the other.
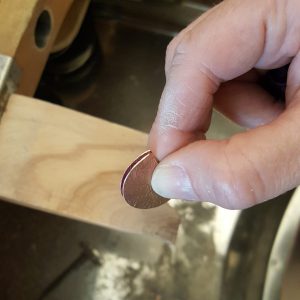
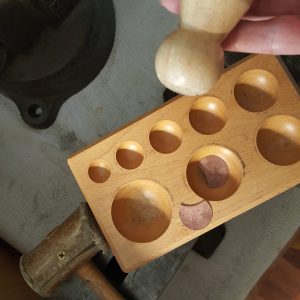
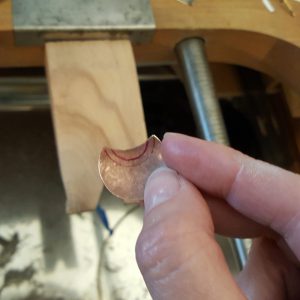
8. Forming the brass.
Here is where I put the nice domed shape into the brass. The shape helps add some dimension to the mixed metal mini shield earrings. I use my wooden dapping block and punches to do that so I do not put unwanted marks in the metal. I hammer the shape into the divots of the dapping block until I get the shape I like.

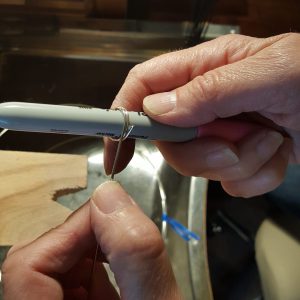
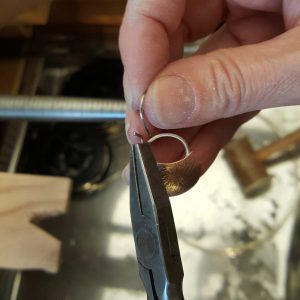
9. Make the rings.
I use sterling silver wire to make the ring part of these earrings. I will make a “spring” or a coil from the silver wire. To do so, wrap the wire around a sharpie. I use a sharpie as a mandrel.
Cut the rings using flush cutters. Make sure each ring is cut in the same place. That way each of them are the same size.
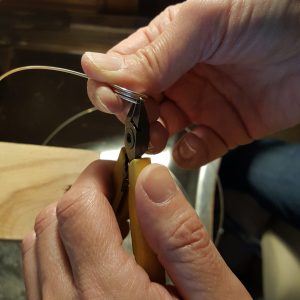
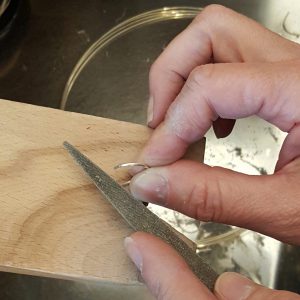
Then I file each end of the ring so that they solder together nicely.
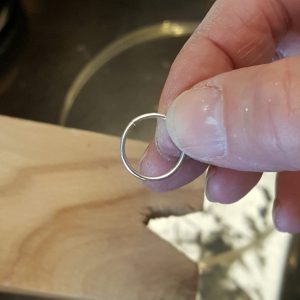
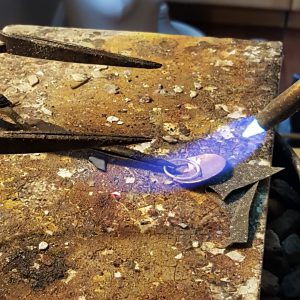
10. Solder the rings together.
Once the ends of the jump rings meet up you can solder them. I lay them flat on my soldering board and flux them. I cut a tiny piece of solder and lay it on each seem and then solder the rings together with my torch.
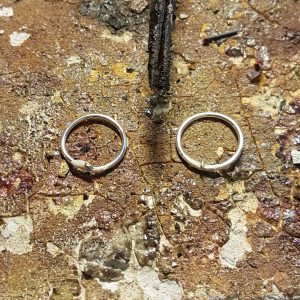
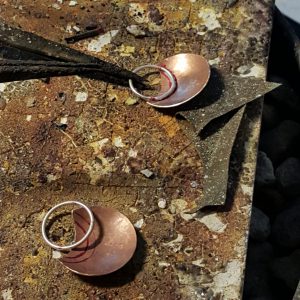
11. Shape the rings.
After the rings are soldered put them on a ring mandrel and hammer them round. These are the rings that will be soldered to the brass. The ear wires will be attached to this part of the earring.
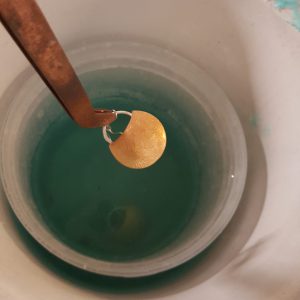
12. Solder the rings to the brass.
Mark the back of each earring where you want to solder each ring. I do this so I know where to put the flux and so when I set up my piece to solder I know where the ring should be positioned on the earring.
I support the rings in my locking soldering tweezers. I use some scrap metal to hold the brass part in place so it does not move when I go to solder it.
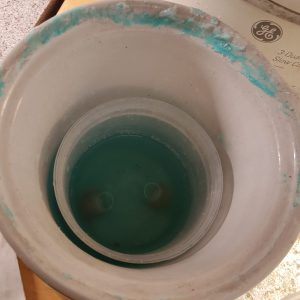
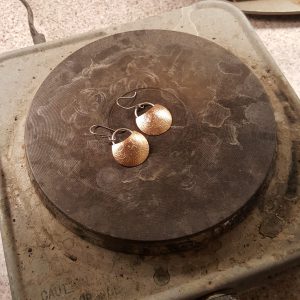
Once the rings are soldered to the brass, I clean the earrings in my pickle to remove the flux and any fire scale that may have occurred.
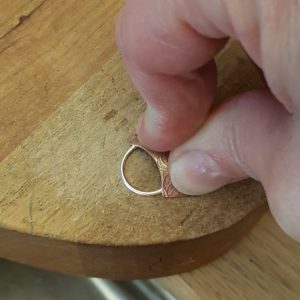
13. Shaping the earrings.
Once again the earrings will need to be shaped a little bit. I lay them on the bench face up and give them a little push downward to bend the ring forward ever so slightly. If you do not do this, the earring may not hang correctly once the ear wire is attached.
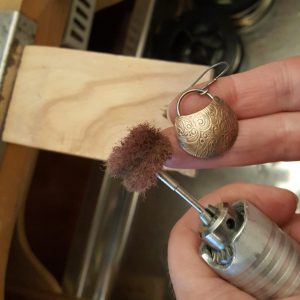
14. Clean up the earrings.
I use my flex shaft to lightly sand off and extra solder and to smooth out any imperfections on the earrings. You can use sand paper as well at this stage but a flex shaft makes the work easier and faster….and believe it or not, I am not a patient person so I always go for the flex shaft since it is much faster than sandpaper.

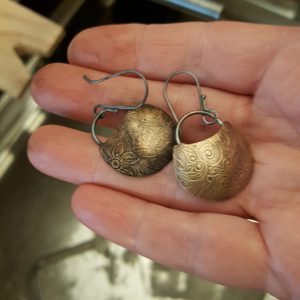
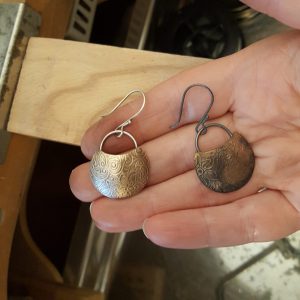
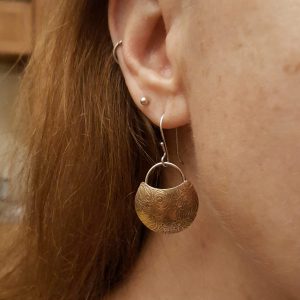
15. Attach the ear wires.
You never want to pull ear wires open. You always want to twist them to the side to open them so you do not change their shape. Put the earring on the ear wire and twist the loop of the ear wire back into place.
16. Oxidize the earrings.
I use liver of sulfur to oxidize and add a patina to my pieces. I heat the earrings with an electric hot plate and then either dip the piece into the liver of sulfur or I will use a paint brush and paint the liver of sulfur directly onto the piece. Oxidizing helps to bring out the detail that I have roll printed onto the metal.
17. Remove some of the patina.
I also use my flex shaft here to remove some of the oxidized patina from the earrings. I leave the patina in the recesses of the earrings because it brings attention to the detail of the pattern that I roll printed onto the metal back in step 4.
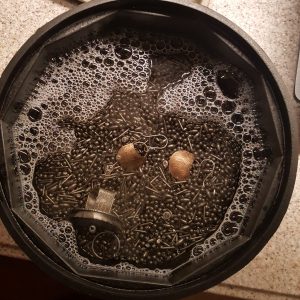
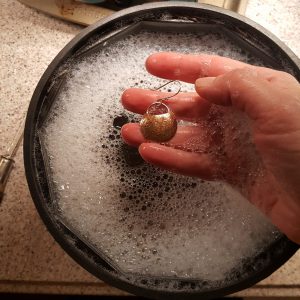
18. Polishing the earrings.
I throw my pieces into the tumbler once they are at the polishing stage. You can polish them by hand as well but this is my preferred method. You can tumble or polish the earrings until the desired finish is achieved. The longer you leave them in the tumbler the more shiny they will become. I tumble with mixed steel shot, a few squirts of liquid dish soap and water.
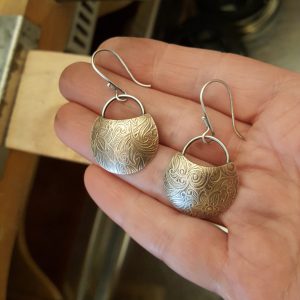
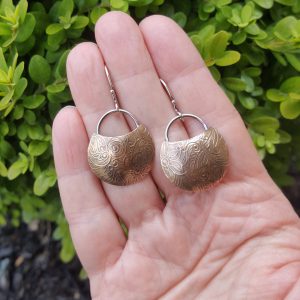
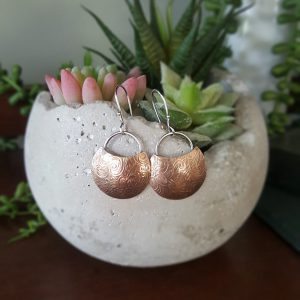
All done!
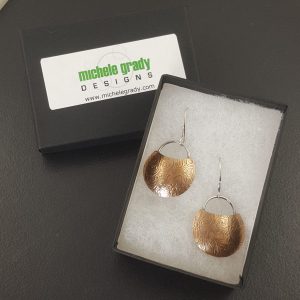
Well there you have it! Just dry off your mixed metal mini shield earrings and pop them into your ears! And for those of you who don’t make jewelry, you can find these earrings a made to order item in my etsy shop here. Also don’t forget to check out all of my latest pieces on my website here. All of the new items I make are listed on my website before they hit my etsy shop. And if you really want to see more into my #jewelerslife make sure to follow me on Instagram here. Not only will you see more things like this, but you can also see a little bit more into my life, my studio and the shenanigans of my fur babies, Django and Spotty! Thanks so much for following along! ~ Michele
They are beautiful! Thanks for sharing your process!
Thank you! And you are welcome!
That’s really cool and interesting. Thanks for sharing your process.
No problem! Glad to share!